Blog 8: Post production

My final deliverables are to produce an art bible, demo reel, shot breakdown and to have the final video of the render.

I created the art bible which contains pictures of the environment and the character and the stages of pre-production. I then moved onto the demo reel which contains everything that I have done for the semester.

As I have had major issues rendering as the render farms did not render out any of my textures and I did not have time to re render as the renders were taking a lot of time I rendered parts of the shots which I applied ambient occlusion to it in order to not lose the lo of the post production as I was running out of time. I have applied it for shot 5 and 4.


Another issue that I faced was that the render farm decided not to render shot 7 even though I have set the setting correct on the file. My lesson for next time is to make sure that I have enough time for post production as well as rendering as things can happen.

Blog 7: Production

As I did not have any animation scenes with my project I had to get a reference video and animate it exactly.  I used the luke rig and I followed the video step by step. It was a very helpful video as it shows the front and the side view which helped me understand what was happening exactly in the video.

I also forgot to mention the type of lighting that I used for the seen. I used a vray sun and 2 sky portals (which were placed near the window) to create the type of lighting that I am looking for.

Blog 6: Production

After unwrapping and gathering the textures of the clothes and placing the textures onto the clothes. I started creating the bump and spec maps for all of the texture maps. After that I started to try the skin shader but I could not understand how to use the skin shader and as I was running out of time I decided to move onto rigging and skinning in order to save time.

For the rigging I decided to create a cat rig as it is much easier and faster. After creating the basic cat rig for the character and adding controllers I then placed the character and started skinning the character. I did not have any problems with the skinning or rigging except for one where the leg was rotated and the skin was rotated with it and I had to fix it which did not take long to do that. I then skinned the shirt, pants and shoes and I created a rig test to make sure that everything is in place. After that I decided to go back to the texture of the character. As I was running out of time I decided to try the skin shader for the last time.character.jpg

The main issue was that I could not add the texture on the phase even after rendering the uvw map and adding the face textures onto photoshop. Therefore I removed the skin shader and added the texture that I created as a diffuse map (vray material).

Blog 5: Pre-production (Part 5) and Production (Part 3)

The final animatic was completed. The next phase after placing the diffuse maps onto the environment was to create the bump, spec and in some cases a displacement map.

I then went back to continue modelling the human. I had to fix the topology of the human as I started adding too many swift loops which are unnecessary. I had problems adding the abs and the chest muscles but then as it got explained to me I understood how to do it (extrude and spine the edges in the direction of the muscle flow). I had problems with modelling the head of the character as the head on the reference plane was incorrect. I also struggled with modelling the eye lids of the character and the nose. I had to look at many videos in order to understand how to get them correct. Another thing that I had problems modelling was the ear and the hands. I got reference images and placed them on  a plane and used them to help me model the ears and hands. After I finished modelling them separately I attached them to the body and smoothed the part where I connected them to ensure a smooth transition.

body 2 .jpg

I then moved to modelling the clothes which were extruded from the main body of the character. I created a tank top, jeans and shoes for the character to make him seem like he is a normal guy trapped.

I then exported my character as an obj and imported him in zbrush to unwrap him ( I also did the same thing for the shirt, pants and shoes). After that I started the texturing process of the clothes. I first gathered the texture (diffuse maps) for the clothes in order to start placing them on the clothes.

Blog 4: Pre-production (part 4) & modelling the environment (part 2)

I finished working on the last version of the animatic which got approved. I had to change the movements of the camera.

I then moved to continue modelling the environment. I started modelling the rest of the walls from boxes and the ground was made from a plane, I also started to work on the door, the door was made from cutting the box out of the wall and i extruded the edges from the wall to other side of the wall to connect them and I extruded the edges from the box of the door to other side of the door. I then made a cut, geopoly , and extruded it a bit to create the base of the handle, I then selected the polygon, inset and then extruded and rotated it a bit to create the handle of the door.

After finishing the environment off, I started to model the human. I first place the reference image on a plane. I first started with modelling the human body. I started added the cuts to the cube. After making sure that the box fits perfectly to the reference plane from the front and side view (half only of the body as symmetry will be applied later. I made the rib cage, chest and stomach. I then went on to extruding his legs (after geopolying it.

After getting the basic form of the character done, I got feedback and had to make a couple of changes to the chest and rib cage as it can be seen clearly in the reference image.


20190424_122035

As I was waiting for feedback, I went to start texturing the environment (the bed, blanket, pillow, mattress, wooden planks, wall, ground, walls and the window bars). I started to get suitable diffuse maps for the environment.


Blog 3: Pre-production (Part 3) & Modelling the environment

After getting the feedback on my second animatic I started to work on it to produce another animatic. The difference was that some shots did not work out and therefore had to be changed in order for the story to make sense (as it was a still life animation).

After developing my third animatic the feedback that I got was to look at more still life animation and research different camera movements as my camera movements were similar (instead of panning I could zoom in/ out).

I also did my research for my character reference in order to choose a suitable reference for the modelling phase.

After that I decided to move onto the modelling phase of the environment as I was running out of time. I started to model the bench within the room from a cube (by making them into a rectangular box) and then I created the nails which sit on top of the bench to add more detail to the bench.  I then moved on to create the room and the window for the bars to be placed in. The window was created by by cutting a rectangle out and extruding an edge to the other side and welding them together. One of the feedback that I got at that point is to make everything not attached as it will make my life easier when texturing (and as they are basic forms I would not need to unwrap). I then placed cylinders to represent the bars. at the window.

I then moved on to modelling the bed, wooden planks for the bed, mattress, pillow and blanket. I created the bed out of rectangular boxes (as well as the wooden planks). I then added cylinders for the bed to create the same type of bed as the ones from my references. The mattress was created from a box and I chamfered the edges to make the edges more smooth. I also did the same thing with the pillow. For the blanket I placed a plane add 2 cuts and moved the edges to drop them down. I then added turbo smooth to increase the number of subdivisions. I then used the push and pull tool to create a rough feel to the blanket as well as the mattress and pillow (to give it a more realistic feel).

Blog 2: Pre-production (Part 2)

After researching a couple of changes had to be made.

1- The room needed to have a personality (as it was too empty)

2- I had to produce an animatic

3- The mood board had to be changed

3- The lighting references had to be changed


To solve the problem of giving the room a personality, I have decided to make the room more like an asylum. I added a bed with a blanket, mattress and pillow.

I produced a rough animatic.

The changes that needed to be made for the animatic were as following:

  • The character remains seated on the bench and the camera zooms out of the door until you see the main character seated on the bench.
  • The character walks to the door (do not turn the room)
  • Turns the door knob (top view)
  • The room spins
  • The character becomes shocked
  • The character looks at the door
  • The character approaches the door
  • The character lies down on the floor


The way that the scene will be lighted is the light will enter from the window. The animatic was then changed again to:

  • The character remains seated on the bench and the camera zooms out of the door until you see the main character seated on the bench.
  • The character walk to the door
  • The character reaches out tot the door handle
  • The room turns
  • The character gets shocked
  • The character walks to the door
  • The character touches the door handle
  • The room rotates
  • The character sits on the ground.


Another thing, which got commented on, is that the camera movement is the same through out the animatic and that I need to change it to zoom in and out instead of having to pan only. Which I had to work on for the next animatic and I had to start to look for a character reference that I could use for my modeling process.


Blog 1: Pre-production

Pre-production


For the first week, I had to come up with an idea for my project. After looking at random animation videos I came up with a theme of entrapment. The idea that I came up with was a guy trapped in a room and the room spinning around ensuring that he can not get out of the room so he remains trapped within the room.

The references that I looked at to come up with an idea include a movie called Room 8, Vale, the last summoning and Anansis Web. These are references to my idea of being trapped and using still life animation to represent my idea.

The story involves the guy being in the room and tries to escape out of the room. The animatic has been refined a couple of time to ensure that I have different camera movements and different poses. The next step was to refine the story.

The story first involved the person to be sitting down, he then gets up goes to the door, he gets shocked as the room rotates, he goes to the door again and the room rotates again and he gets shocked again. He then falls to the ground and lies down as he gives up of getting out of the room.

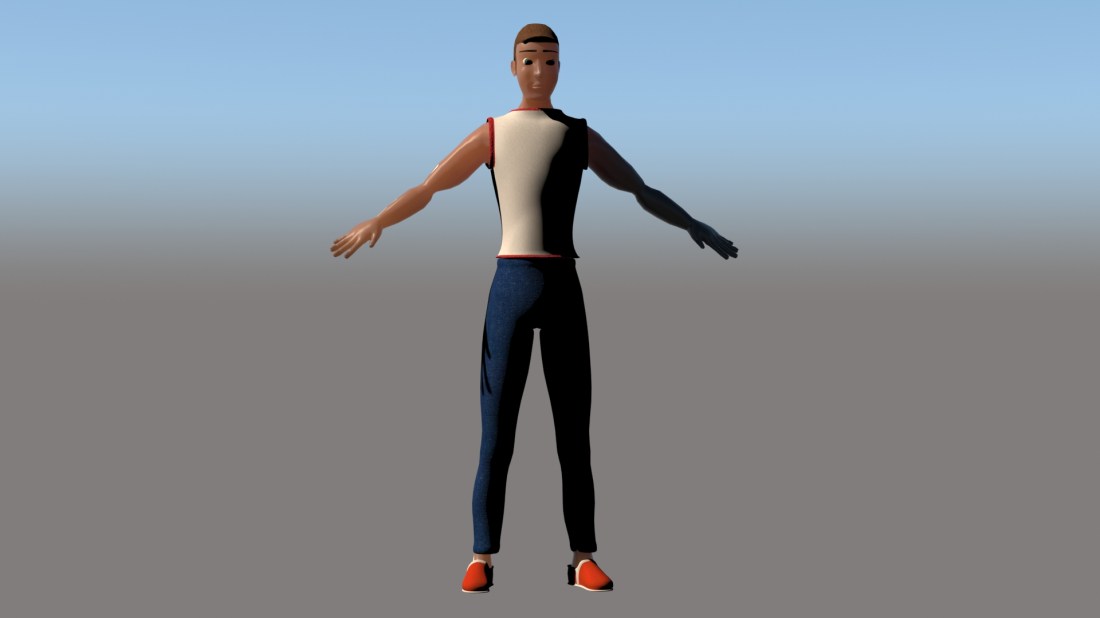
I had to make a list of assets required for the scene and get a suitable character reference.

The list of assets required:

1-Bench (Wood)

2-Metal Door

3-Metal bars (window)

4- White room


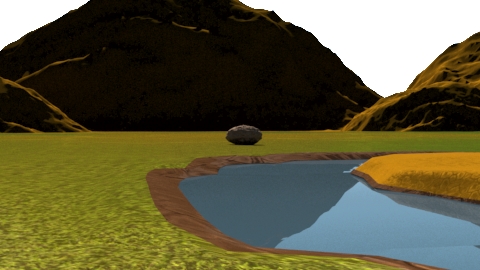
The main idea is to make the room feel like a prison. One of the suggestions that were given to me is to make him trapped in a cage and unable to escape from the cage. I looked at many references which a man was stuck in a cage in. I also looked at references for lighting in order to understand how I want my lights to be in the environment.

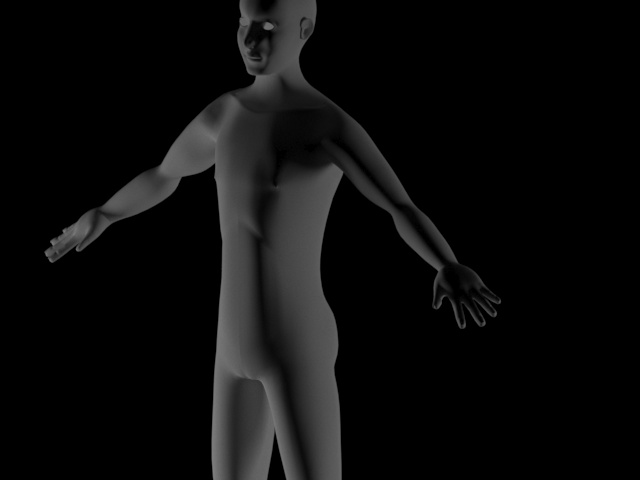
I looked at the poses that I want for my character to pose.

I also created a mood board to understand what kind of mood I am looking for.

Another thing that I created was I made a couple of sketches of the room of the textures and the placements of the objects within the room. I drew a top view of the room and rough sketches of the overall room.

I made the character a male one instead of a female one, as the male character will fit more into the role than a female one.

Week 10-13 Animating, Rendering & Postproduction

For the last 3 weeks I had to animate shot 6 & 7 (get the knight in the position were his foot was in the water and I had to animate the water using space warps. I had to add the ripple effect but as the overall terrain turned out to be huge I subdivided the two polygons which the knight touches several times to create smaller polygons so that the water effect of the ripples is stronger. I set the wave length and the number of waves and then I linked it to the plane. I animated the the wave length 0 and the number of waves to be 0 and at 100 I would increase the wavelenth and the number of waves to create the ripple effect. I duplicated this also for shot 7. I then had to start rendering, Ross sent the files to get rendered. For the post production I was given a different shot to do. I was given shot number 18.

The post production was very fun. The post-production layout was done by arafa. All I had to do was follow the way everything is layered. I used extractor to get the shadow, reflection, zdepth blur. I had to colour grade the shot as the shot was more greenish. After finishing copying the values off the other shots to keep the consistency.

Week 8-10 Unwrapping & Texturing

To start with the objects were unwarpped which I didnt have to do because they are very simple objects but I unwrapped them just incase. I then went to search for textures that are suitable for the environment that we are creating. For the ground and mountains I used this texture map as a diffuse map (except I made it abit yellow-ish).

At first I used the dark texture to the mountains and the ground however everything ended up looking like chocolate, therefore I change the colour to make it more yellow-ish but I used the dark one the polygons which are in contact with the water.

I also used the yellow one for the ground, as I wanted the grass to be a mixture of grass and sand I used vray blend material were it blends two materials together. I opened photoshop filed the layer with black and I added white areas so it is a mixture of black and white and I then used this file to create where the grass would go and were the sand would go.

final terrain with texture

I created the bump, spec, and displacement for each of the texture maps. For the ground those were the texture maps for it:

For the rocks the texture maps that were used were:

Final results:

environment 2terrain final re-sized