The final animatic was completed. The next phase after placing the diffuse maps onto the environment was to create the bump, spec and in some cases a displacement map.
")

")


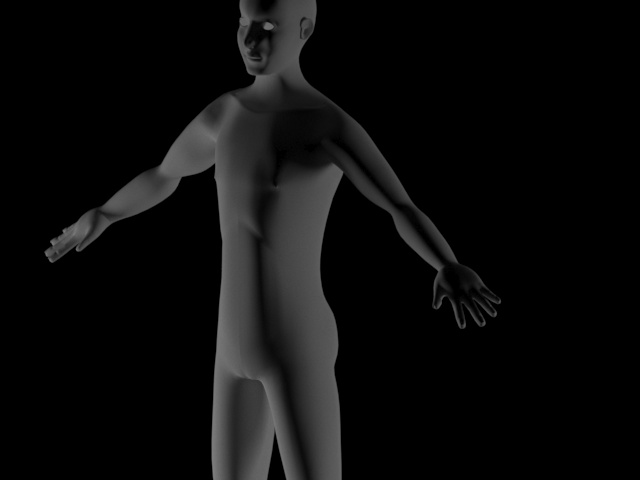
I then went back to continue modelling the human. I had to fix the topology of the human as I started adding too many swift loops which are unnecessary. I had problems adding the abs and the chest muscles but then as it got explained to me I understood how to do it (extrude and spine the edges in the direction of the muscle flow). I had problems with modelling the head of the character as the head on the reference plane was incorrect. I also struggled with modelling the eye lids of the character and the nose. I had to look at many videos in order to understand how to get them correct. Another thing that I had problems modelling was the ear and the hands. I got reference images and placed them on a plane and used them to help me model the ears and hands. After I finished modelling them separately I attached them to the body and smoothed the part where I connected them to ensure a smooth transition.
I then moved to modelling the clothes which were extruded from the main body of the character. I created a tank top, jeans and shoes for the character to make him seem like he is a normal guy trapped.
I then exported my character as an obj and imported him in zbrush to unwrap him ( I also did the same thing for the shirt, pants and shoes). After that I started the texturing process of the clothes. I first gathered the texture (diffuse maps) for the clothes in order to start placing them on the clothes.
